Not hard to make a 4 flat to a 4 square here is a link:thumbup:
http://myspyderstuff.wordpress.com/2013/07/15/can-am-spyder-hitch-kit-4-pin-adapter/

The picture below shows the connector cut in half.

The connector that I purchased has two ribs on each side for gripping purposes. A picture of those ribs is shown in the picture below. They must be removed to achieve the proper distance between the pins when the two 2-pin sides are reattached.

The picture below shows the two 2-pin connectors with the ribs carefully sliced off using the same sharp knife that was suggested above.

The picture below shows the two 2-pin connectors reconnected, temporarily, with a piece of black electrician’s tape. NOTE there is only ONE way the two pieces are to be reattached, and that is where the ribs have been removed from one side of the original connector. A test fitting of the reattached, taped, now 4-pin ‘square’ connector will verify the correct alignment of the connector. Incorrect reattachment will result in the turn-signals on the Spyder blinking on opposite sides as the sides blinking on the trailer! The camera angle is causing a distortion of the image such that the pins look mis-aligned… they are all parallel to each other!

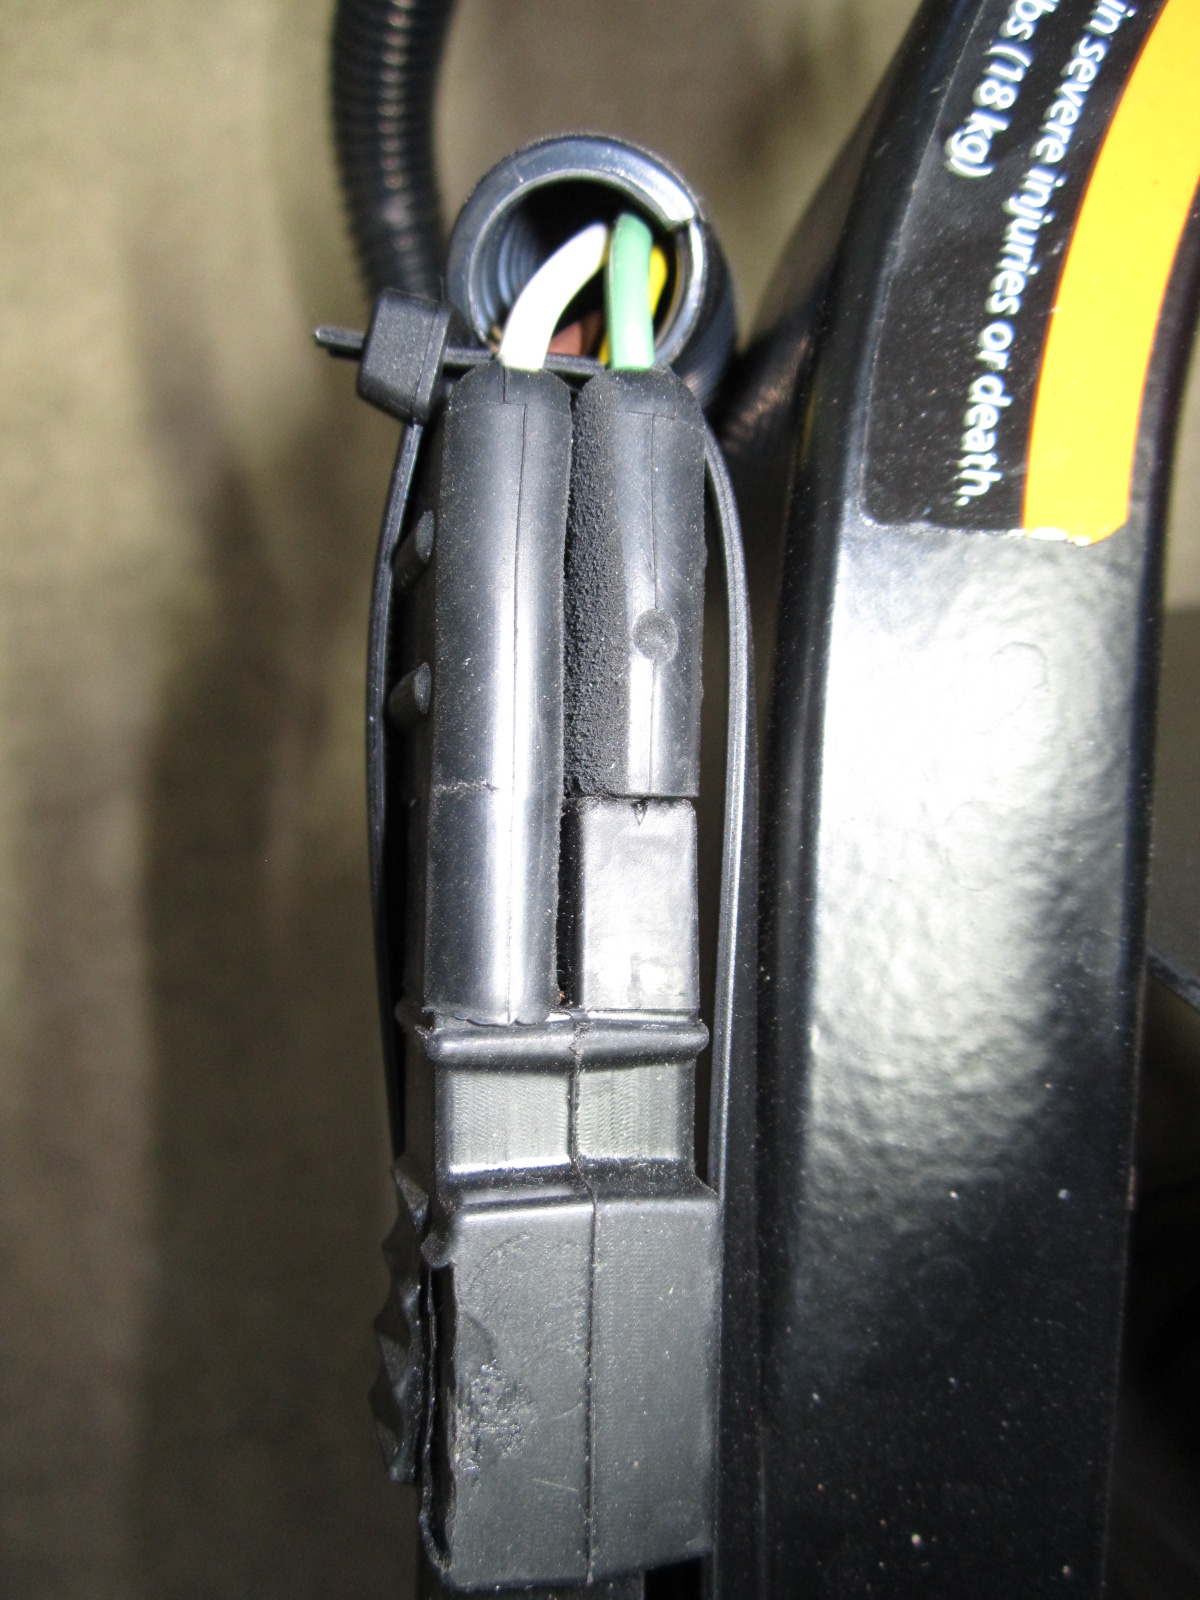
The test fitting of the newly fashioned 4-pin square connector on the Spyder trailer hitch is shown below.

Note that it may be necessary to remove additional material on the newly fashioned 4-pin square connector where the two sides meet since the combined width of the sides of the original 4-pin flat is likely greater than the distance between the pins, on center, of the original 4-pin flat connector. Sandpaper can be used, carefully, to thin each side, independently, equally.
Permanently attach the correctly sized sides using an appropriate permanent glue with black electrician’s tape wrapping for additional strength and integrity of the connection.
Additional pictures and remarks may be added after testing this modified harness on a after-market, non-BRP trailer that is on order at this writing.
Revisions / Addendums:
The tow-behind trailer arrived in pieces, and after assembling the parts there were ten wires coming out of the front that controlled all of the lighting of the trailer. Those ten wires were attached to the 4 wires of the modified 4-flat trailer wiring connector.
Additional sanding of the sides of the connector that meet to form the square was required to achieve the correct dimensions of the part. Note that the rubber tends to roll against the sandpaper so some care must be exercised in this operation to maintain the ‘flat’ of the surface being sanded.
The picture below is of the modified 4-flat connecter plugged into the 4-square of the hitch of the Spyder Can-Am with an electrical tie added to maintain the connection in rough highway conditions.


 hyea:
hyea: