Peteoz
Well-known member
Hi boys and girls,
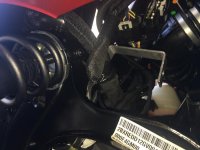
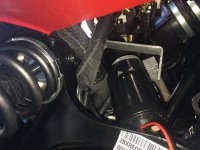
I am trying to install a Wolo on my F3 Limited and am really having trouble. Any advice from those who have installed one would be greatly appreciated. I have attached a couple of pics. I am sure I have attached the bracket to the correct body bolt, but.....
My issue is that I can not get the Wolo vertical in the bracket, but only at 45 degrees away from the bolt due to the very thick, immovable cabling running alongside it. I am not sure if there is perhaps more cabling on the Limited or not, meaning the cable is possibly thicker than standard.:dontknow:
I have made two offerings to the Nut god by dropping two nuts (that I cannot find) into the bodywork, but I have STILL had no luck.:gaah:
I have attached a couple of photos of the bracket itself and the Wolo in the bracket at the angle.
I have even threatened the Wolo with its immediate demise if it does not come to the party, but even that has not worked.:lecturef_smilie:
I am now using my bleeding hands to type this message, hoping that someone will call me an idiot and tell me what I have done wrong...
..
 p.s. The photo angle is the same one Spyderpops uses to show the bracket mount position. Taken from just behind the left wheel.
Pete
I am trying to install a Wolo on my F3 Limited and am really having trouble. Any advice from those who have installed one would be greatly appreciated. I have attached a couple of pics. I am sure I have attached the bracket to the correct body bolt, but.....
My issue is that I can not get the Wolo vertical in the bracket, but only at 45 degrees away from the bolt due to the very thick, immovable cabling running alongside it. I am not sure if there is perhaps more cabling on the Limited or not, meaning the cable is possibly thicker than standard.:dontknow:
I have made two offerings to the Nut god by dropping two nuts (that I cannot find) into the bodywork, but I have STILL had no luck.:gaah:
I have attached a couple of photos of the bracket itself and the Wolo in the bracket at the angle.
I have even threatened the Wolo with its immediate demise if it does not come to the party, but even that has not worked.:lecturef_smilie:
I am now using my bleeding hands to type this message, hoping that someone will call me an idiot and tell me what I have done wrong...
..

 p.s. The photo angle is the same one Spyderpops uses to show the bracket mount position. Taken from just behind the left wheel.
Pete
Last edited:
