IdahoMtnSpyder
Active member
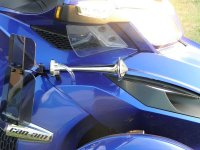
As we know the '13 RT does not have a really good space available to conveniently install a Wolo Bad Boy air horn. The space under the lights that worked on the '12 RT is occupied by the battery jumper posts on the '13, and the '14 has space where the radiators are on the '13. So I decided the next best approach was to install trumpet air horns on the outside of the body. I bought the Wolo Model 415-MC Airsplitter Super Loud Chrome Metal Dual Trumpet Air Horn Kit from Amazon. http://www.amazon.com/gp/product/B000GKEZGE/ref=oh_details_o00_s00_i00?ie=UTF8&psc=1 and http://www.wolo-mfg.com/motorcycle.htm.
Now, the question was where to mount the compressor.
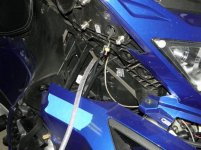
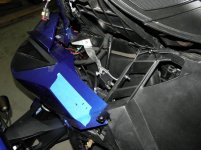
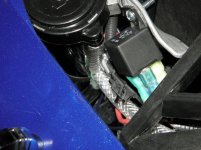
When I pulled off the upper side panel I discovered a nice space available that was plenty large enough for the compressor just behind the fog light area. See the pic here.

Now, how to mount the compressor? I took a 1/8 x 1" aluminum bar and bent it and twisted it to fit between two plastic support areas as shown here. In order to get the compressor to fit best I riveted a tab hanging down from the main bar.
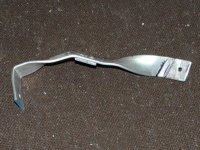
Here's a close up of the bar. I did a lot of twisting and bending by trial and error to get it to fit properly.
Here's the compressor mounted on the bar. It should have been a bit farther forward as it's tight against the electrical connector.
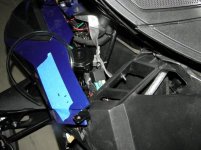
The relay was part of the kit but I had to put together all the wiring. I already had a tap into the horn wires so I just connected into that for the power to activate the relay. Horn power comes from another connection on the battery power jumper post to the relay, then from the relay to the compressor. I've got a half dozen ring terminals on that post now. Ground lead goes from the compressor to the negative battery jumper post.
The Wolo instructions say to keep the hose length to no more than 10" for best operation. Well, that's nigh impossible on a Spyder. So I got some 1/4" reinforced poly tubing from the hardware store and some tubing fittings. You can see a short length from the compressor outlet to a Tee. I didn't use the Y splitter that came in the kit. Reinforced tube is connected to one side of the tee and snaked over the air box to the other side of the bike. I used the factory clear tube from the other tee connection to the left side horn.
Now, the question was where to mount the compressor.
When I pulled off the upper side panel I discovered a nice space available that was plenty large enough for the compressor just behind the fog light area. See the pic here.

Now, how to mount the compressor? I took a 1/8 x 1" aluminum bar and bent it and twisted it to fit between two plastic support areas as shown here. In order to get the compressor to fit best I riveted a tab hanging down from the main bar.

Here's a close up of the bar. I did a lot of twisting and bending by trial and error to get it to fit properly.

Here's the compressor mounted on the bar. It should have been a bit farther forward as it's tight against the electrical connector.

The relay was part of the kit but I had to put together all the wiring. I already had a tap into the horn wires so I just connected into that for the power to activate the relay. Horn power comes from another connection on the battery power jumper post to the relay, then from the relay to the compressor. I've got a half dozen ring terminals on that post now. Ground lead goes from the compressor to the negative battery jumper post.
The Wolo instructions say to keep the hose length to no more than 10" for best operation. Well, that's nigh impossible on a Spyder. So I got some 1/4" reinforced poly tubing from the hardware store and some tubing fittings. You can see a short length from the compressor outlet to a Tee. I didn't use the Y splitter that came in the kit. Reinforced tube is connected to one side of the tee and snaked over the air box to the other side of the bike. I used the factory clear tube from the other tee connection to the left side horn.


