Snoking1127
Well-known member
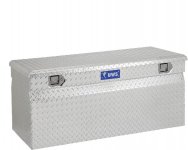
So today I bought 6.x12 foot Primo aluminum trailer for hauling the Spyder between Arizona and Washington State. I wanted the model with the enclosed sides, however they did not have one in stock. I will enclose myself at sum point most likely. Dry weight of the trailer is 600 lbs and GVWR is 2990 lbs with 3500 torsion axle and 15" radial tires and mag wheels. I settled for a steel rim spare tire. Arizona to my surprise for $172 is providing a life time registration/license plate. I well have to work out some blockage or pre ramps to load the Spyder as the bi-fold ramp is not long enough. We did a test on a 6x10 with some 2x6's and cranking the tongue up. I ordered this 60"L x 24.5"D x 20.5"H chest box to go in front the Spyder. https://www.amazon.com/gp/product/B000MK4F6S/ref=ppx_yo_dt_b_asin_title_o00_s00?ie=UTF8&psc=1
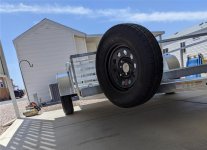
I am also looking to put one of those angled A-Frame boxes on the front frame. Going to work on raising the spare tire up a bit first. It is pretty low to the ground.
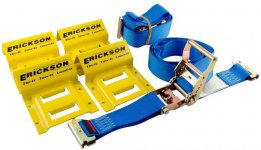
I also ordered these tie downs for the front wheels and may do that for the rear tire also.https://www.lowes.com/pd/Erickson-Wheel-Chock-and-Strap-Kit/1002696212
I will provide "build" pictures as I go along. Chris
I am also looking to put one of those angled A-Frame boxes on the front frame. Going to work on raising the spare tire up a bit first. It is pretty low to the ground.
I also ordered these tie downs for the front wheels and may do that for the rear tire also.https://www.lowes.com/pd/Erickson-Wheel-Chock-and-Strap-Kit/1002696212
I will provide "build" pictures as I go along. Chris


")


 hyea:
hyea: