• There were many reasons for the change of the site software, the biggest was security. The age of the old software also meant no server updates for certain programs. There are many benefits to the new software, one of the biggest is the mobile functionality. Ill fix up some stuff in the coming days, we'll also try to get some of the old addons back or the data imported back into the site like the garage. To create a thread or to reply with a post is basically the same as it was in the prior software. The default style of the site is light colored, but i temporarily added a darker colored style, to change you can find a link at the bottom of the site.

2012 RTS SE5 compressor issues! And how do I get at it?

NorwegianRT

Active member
Hi all !

My compressor seems to have stopped working. I push the button and the display shows the five steps for adjusting, but nothing happens !:dontknow:
For a short while the "manual" came up on the display and I could let air out, but not put air in.
After shutting down and waiting a bit, the normal 5 steps appear on the display again when bike is running again. I am thinking something electric maybe ?

Also, to get to the compressor behind the splash guard, do I have to remove the whole trunk and luggage compartements ???
 
If it says manual then more than likely you have a compressor going bad. I have replaced 2 compressors and 1 ACS switch. I no longer have the compressor. I use my home compressor to add air when needed. As far as removing compressor I would remove rear module. First remove passenger backrest, this allows more room to get the seat hinge bolts off. Remove seat. Then the lower side panels need to come off. Remove the left side cover under passenger hand rail. This allows you to unplug the 2 large cables. There is a total of 7 bolts that need to be removed. The 4 large bolts under seat, 1 ground strap. There is a bolt min front of each saddle bag that has to be removed. Now the whole rear assembly now can be removed. Once it is removed, you now have access to remove upper splash guard. Compressor is now accessible. I went further and removed rear tire and ACS linkage and rear shock. If you are removing the compressor disconnect the ACS switch power and also remove the bleeder actuator. If you don't it will drain airbag while riding. Good luck, Bruce
 
Hi Bruce and thank you for the reply !
I will try to use the valve under my seat and see how that works for my rides.
As for the compressor I am considering letting my dealer have a go at it during winter storage if it can last until then.
 
Just one more question !
When adding air manually through the valve, will the amount of preassure stay the same through out the ride ?
 
Just one more question !
When adding air manually through the valve, will the amount of preassure stay the same through out the ride ?

It will unless there's a leak in the system somewhere.

Actually, No it won't - that's because even though the air compressor is not operating, the sensor and the vent valve still are. So, every time you go over a bump, bridge, etc, and the rear suspension moves up and down, the vent valve will let the air out. Without a compressor to refill the air, all of the air will be gone in a matter of minutes.

So, Norwegian, you're kind of in limbo right now. First check for leakage. Tonight, use the valve under the seat and put between 50 and 60 pounds of air in it. Just let it sit overnight, and check the pressure in the morning. Remembering that you'll lose about 2 pounds every time you check it, and remember that it is probably cooler in the morning, see how much pressure you have left. If it held pressure, then you can take these two quick steps:

- Go into your fuse box and remove the suspension relay - R1.
- Remove the right side panels and find the vent valve mounted to the right side framework. It's got all of the air tubing going to it. Follow the wire harness leaving the valve and unplug it at the connector. The connector is probably behind the framework kind of hidden. Seal up the wire harness from moisture where you unplugged it.

Now you can run the system manually by adding air under the seat and it will stay at pressure.

On the other hand, if you have a leak and all of your air pressure is gone the next morning, you are kind of stuck. There's no way to keep air in the system. The two most common places for leakage on the 2012 is at the compressor check valve, and at a swiveling elbow joint on the vent valve. And yes, sometimes at the top airbag fitting. But, while you are looking at the vent valve with all of those panels off, you will see that an interim and alternative fix is relatively easy.

Disconnect the tubing coming from the air bag and the valve under the seat from the vent valve. They are push-to-connect fittings, so you release them the standard way for those fittings. It takes a few tries. Purchase an in-line tubing coupling and connect the two ends together. Make sure it is rated for those high pressures. Don't use a cheap plastic one. Now, all you have is a straight line of tubing from the valve under the seat directly to the air bag. Do another leak test over night. I bet it holds air this time. If it does, remove relay R1 and unplug the vent valve if not already done before. Now you can ride for the rest of the season. And, there's a high probability that you'll like it better and just keep it that way for good.

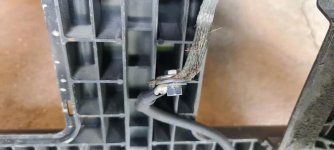
Thank you for a great and instructive reply Doug:2thumbs:

I will put some pressure on it and leave it overnight and check tomorrow.
I had my rear speed/abs sensor changed earlier this season, so getting familliar with all that needs to be removed :gaah:
Will also be able to check where the voltage is since the compressor doesn't even kick in.

I will come back with update !
 
Last edited by a moderator:
Typically, it fails internally and can't spin, even though it gets power. If you end up thinking that you want to replace it yourself, and at the same time switch to a different brand of compressor, here's a great video of the job. It's a 2011 machine but that is identical to yours. Skip the ads. 41 minutes. Good Luck.

https://www.youtube.com/watch?v=5NR_LY7u8eY

Awesome Doug:2thumbs:

Saved the video link for later use !

Thank you again !
 
One more thing I forgot to mention, if your check valve is sticking or not sealing good it will leak air there also. The valve is attached to the compressor. Bruce
 
Compressor issues solved

Good news friends, the compressor is working again!

I took all the panels and the rear module (trunk and side compartments) off. Then I got the compressor out and hooked it up on a 12 car battery. It started up but had no air coming out, so I suspected something wrong inside.
Took out the 4 little screws holding the little grey panel and removed the panel. It allows you to see the piston rod, and mine had fallen off the axle coming from the motor. So the motor did turn all the time, it just did not pump air.

On the counter weight there is a set screw that pushes against the flat side of the motor axle, and this was not tight enough on mine. I tightened it up some more and re-installed everything. Now the compressor pumps air and I am a happy guy once again :ohyea:

Thank you all that have replied and helped out with vids and tips :2thumbs:

Safe rides friends!
 
Last edited by a moderator:
Wow, you have been busy today. That's exactly what Keith found. I had forgotten. Sorry. I suppose I could fix mine someday....not. I like doing it manually. Be safe out there. Nice chatting with you.
 
The set screw was used on the earlier compressors. Later models used a different setup. Bruce
 
Last edited by a moderator:
Wow, you have been busy today. That's exactly what Keith found. I had forgotten. Sorry. I suppose I could fix mine someday....not. I like doing it manually. Be safe out there. Nice chatting with you.

Hi again Doug
It was a busy day for sure, but rewarding.
And I now know how to take it all apart and connect if I ever have to go manual through the valve :cheers:
Thanks for the chat Doug, my pleasure and safe rides to you also!
 
Last edited by a moderator:
Back
Top