OK, as there was a forecast for three days rain here in my area, I decided to try the replacement yesterday.
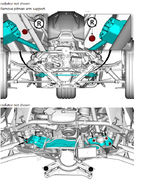
As already posted before, there is some kind of short way for the replacement according to the lastest bulletin.
As I do not have the time and experience for the usual and former posted description in the long way
(disassembling a lot of front parts of the Ryker) I thought this could be a possible way for me to do the job:
https://static.nhtsa.gov/odi/tsbs/2025/MC-11015830-0001.pdf
After about two hours of work I can definitely say, that it can not be done in that way.
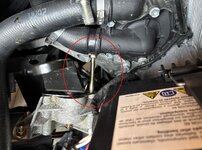
The reason is, that the right screw, which holds the pitman arm and the SAS sensor, can not be removed.
This screw is so long, it collides with the big black hose on the inlet side of the water pump (I even removed the hose clamp there).
I could not get this screw out, without removing the hose, which means to drain the coolant,
and even then, the hose connector of the pump would still be there.
Approximately 0.75 inches (2 cm) of additional space is needed to remove this screw.
You can see it in the picture below (the whole threaded part of the screw is still inside the pitman arm support):

I can not understand why the bulletin shows this short way (with a total time of 1.8 hours for the shop).
In the bulletin there are only Rykers MY21/22/23/24 mentioned, mine is a MY20.
Maybe there is a little difference in the arrangement of the other parts in that area and therefore more space (but I don`t think so).
In my case, as nothing more was possible for me, I replaced the sensor sleeve at least
(small plastic part which connects the SAS to the pitman arm) and put everything back together.
My pitman arm itself had a very firm fit in its support, I could not detect any loose movement
what lets me hope, that my problems when riding do not result in a loose fitment of the pitman arm.
If these problems are still there, which I guess, I will take the bike to a shop to have the bearing replacement done there.
Michael


